Hello there!
Recently the SheetMusicSinger project has begun using MuseScore to help transcribe the many songs we’ve dug up, and also to help speed up the existing process. As a long-time user of MuseScore, I am here to assist as many of you as possible in using this program effectively. To begin, here is the first of what I assume will be a 3-part series on how to use this program.
First things first. The Interface.
When you first start up MuseScore, you should be faced with something similar to this (kindly ignore the songs I’ve been working on myself):
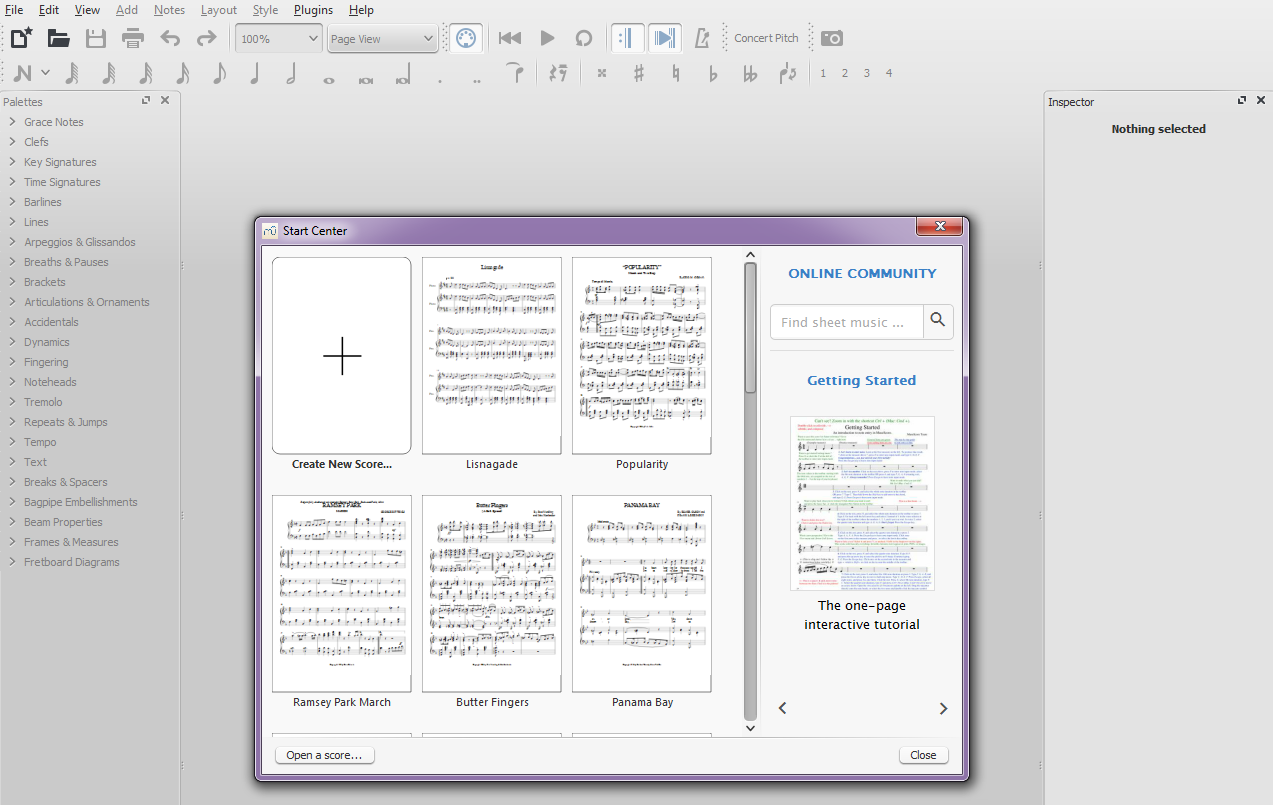
From here you have a few options on what to do next. If you want, you can attempt the interactive tutorial, but I’ll be going over it as we go through this. I do recommend pressing the arrows below it until you see a link for the MuseScore guidebook. This will help explain some of the more complicated things, and might assist you in understand some of the things I mention (though I’ll try to make sure it won’t come to that).
For the purpose of this tutorial, do what you want to do first, then close the start center, go under File and click ‘New’.
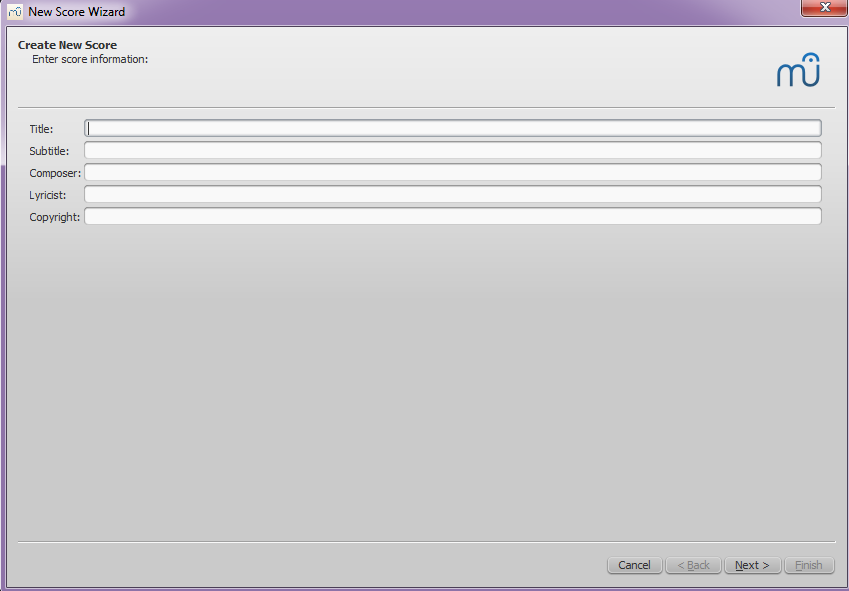
Nothing terribly important here, just skip it for now. When you get to actually transcribing stuff I recommend filling in as much of these fields as possible for the purpose of authenticity and information. Hit next, then scroll down until you see the option for Voice+Piano, since that’s what you’ll be dealing with in this project.
From there keep the default options. Key of C, tempo 100, 4/4 time. Basically just hit next until your test score appears before you.
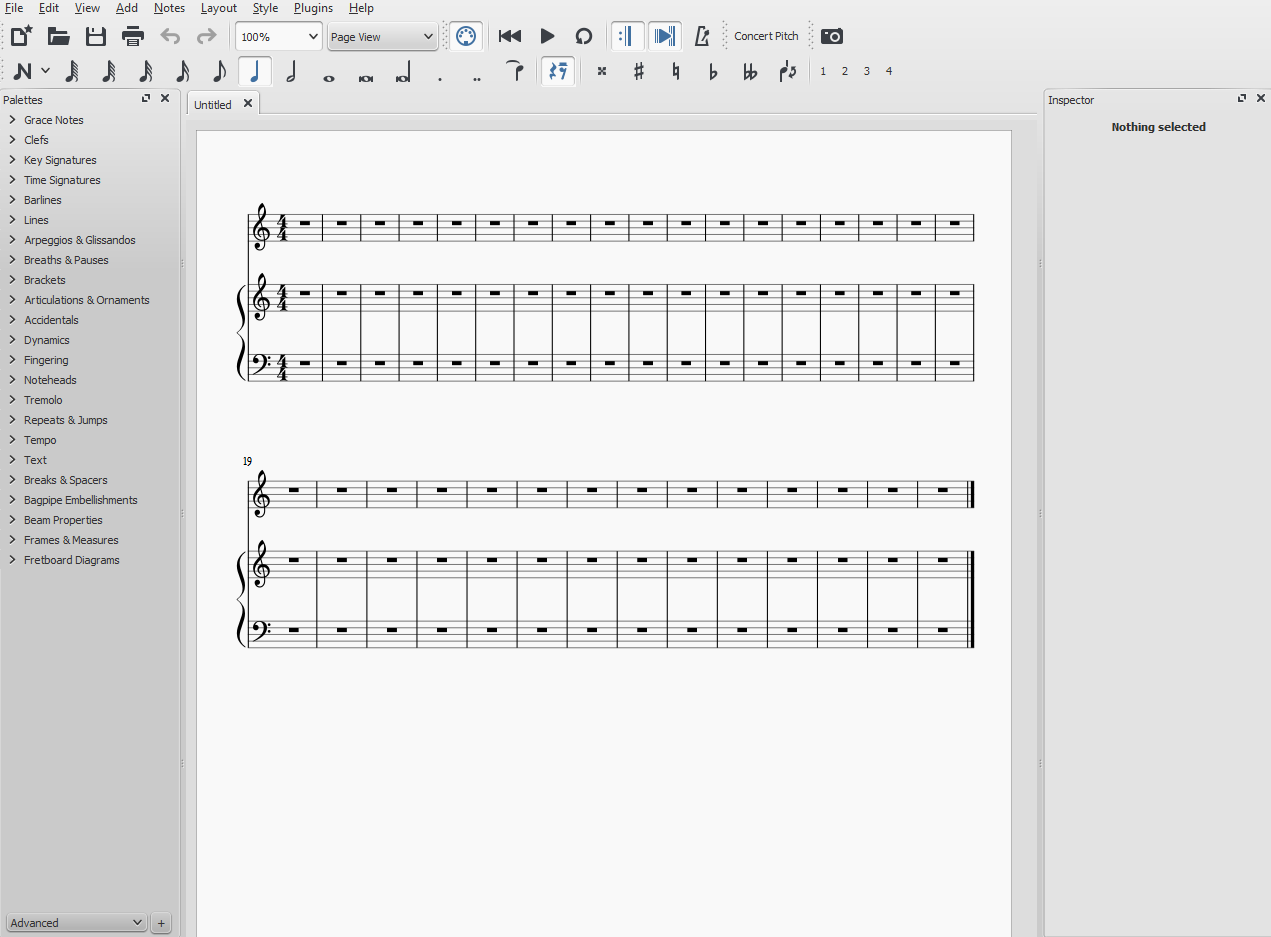
Voila!
Before you actually do anything, we need to go over all the options you have available to you (there’s a lot). First, set the drop-down menu on the bottom-left to advanced. It already says that for mine, but it might say basic for you. I estimate less than a 1/4th of these options will go unused in the average score, but it’s good to be prepared.
And now for a quick run-down of what everything does, starting from the very top:
File: Mostly options for exporting the score, or saving it. Of particular interest is ‘score properties’ where you can edit stuff like the copyright text should you mess it up.
Edit: The only real important options here are ‘Instruments’ and the ‘Measure’ subcategory. The former is where you can add or remove instruments (but not swap one with another unless you copy and paste everything). Measure options are for deleting measures if necessary.
View: Allows you to open up a few important panels if need be. Master palette for rare or obscure signals (such as ‘ffff’ or ‘pppppp’ dynamics), synthesizer is for managing master volume and sound plugins, piano keyboard is if you want to see the notes played on an actual keyboard. The rest is unimportant.
Add: Allows you to add stuff like measures, frames, or crescendos. Everything but adding measures are easy to do without this menu.
Notes: The only important stuff here has hotkeys.
Layout: Page settings is the only good option, where you can change the size of a single page. You can fit more measure lines onto a single page if you play around with it enough, though this isn’t always necessary.
Style: Under general you have the option of hiding empty staves. Most sheet music has no vocal track above the introduction measures. With these options you can get rid of those vocal measures for authenticity.
Plugins and Help: Nothing of particular interest, at least to me.
Now for the stuff just below that:
![]()
The very first button is a shortcut for making a new score. Everything from there until the arrows is rather unimportant and can be done with the aforementioned menus anyway. The arrows are another way of undoing and redoing, but this is easy to do with ctrl+z/y anyway.
You probably won’t have to adjust the zoom
Page view I consider to be superior.
Everything else on this line is unimportant save for the play and rewind buttons.
Below that is note options. From left to right: Note input mode (this can be toggled by pressing ‘n’), note duration (16th, whole, 128th, etc), augmentation dot, double augmentation dot, ties, rest, accidentals, flip, voicings. The important stuff is as follows:
Note duration: As I mentioned, whole notes, half notes, quarters, etc. There are hotkeys for each, but I personally haven’t memorized them.
Ties: Allows you to tie together 2 or more notes/chords. A few things to keep in mind that deleting a note that’s in front of a tie will keep the tie sign, but adding a new note will not ‘connect’ the two. Also, cross-measure ties are currently impossible, but a slight bypass of sorts can be done, which I’ll touch on in later posts.
Rest: In order to insert a rest, you need to select a note duration, then click on rest before inserting it.
Voicings: Allows you to put notes of different durations in the same place. Usually you will only need two. I will go into specifics on how this works later.
And for the palette:
Grace Notes: Notes inserted before or after a note. For some reason the grace notes that come after don’t play, so you might have to get tricky with it.
Clefs: The only real important ones here are treble and bass clef. I will note that switching clefs mid-measure can be interesting. They can be placed before a measure, or before a note/rest. Look closely for which it will be.
Key Signatures: Allows you to switch key signatures mid-score.
Time Signatures: Same as the above, but with time. If you change the time signature in front of a bunch of measures with breaks and/or spacers (I will get to those), these will be deleted for some reason. I recommend getting it right the first time so you don’t have to re-do everything.
Barlines: Regular barlines, double barlines, repeat lines, etc.
Lines: All sorts of interesting lines. Ending lines, (de)crescendos, octave lines, pedal lines, trills, and the like. Something very important to note is that if you put a line over a single measure and manually extend it over other measures, its effects will NOT spread to those measures! You need to shift click to select the measures/notes you want to be affected, and THEN click whichever line you want to use.
Arpeggios & Glissandos: Arpeggio signs indicate a chord or series of notes to be played in rapid succession, instead of all at once. I have to encounter glissandos in my adventures so far.
Breaths & Pauses: Occasionally you will come across pause signs. These indicate how many seconds to pause for, so set accordingly if you feel it’s too long/short.
Brackets: Almost never used, don’t worry about them.
Articulations & Ornaments: Different symbols that alter how a note is played or how long it’s held. Fermatas need to be manually set how long they will hold the note for. Other than them, the most common 3 articulations you’ll see are sforzatos, staccatos, and marcatos.
Accidentals: Sharps, flats, and really weird related symbols. The only important ones can be found above the score. Brackets are here and need to be manually dragged to a note or accidental.
Dynamics: Dynamic signs. I find it easiest to just drag and drop to where you want it. Keep in mind a single sign in the middle your average piano measure will affect all the notes there. You do not need to add them anywhere else (except other instrument lines) for it to work.
Fingering: Fingering signs. I find them a hassle to deal with, but thankfully they don’t appear too often.
Noteheads: Allows you to change the shape of a notehead. You will after never need to do this.
Tremolos: There are two kinds. Ones that affect a note or chord, and ones put between notes/chords.
Repeats & Jumps: Signs for, well, repeats and jumps. There’s a bit of technical stuff behind these I will try to go over later.
Tempo: Tempo signs you can insert wherever you please for dynamic tempos. For simplicity, only go with the quarter note sign.
Text: Allows you to add more text to measures. There’s a lot of things you can do with this, so I’ll try to remember to touch on it later.
Breaks & Spaces: Lets you ‘beautify’ your score a little by indicating where a measure line should end, and how far apart lines are.
Bagpipe Embellishments: A complete nightmare and probably not important anyway.
Beam Properties: Changes how note beams behave. For instance, if you are in 2/4 time and need 4 eight notes to all share the same beam, this is where you would do this. In addition, lyric tracks almost always have no beams between notes.
Frames & Measures: Allows you to add frames to change the position of measure lines. If you want an example, have you ever noticed how some sheet music has the introduction line or trio line indented? This is how you change that. The ability to add measures here is not important.
Fretboard Diagrams: Never had to use this. I think it’s guitar stuff? You probably won’t need to use it either.
And that concludes the first guide post. Sorry we couldn’t go over any actual transcribing efforts, but we’ll get to that eventually. For now the most important thing is getting to know your tools. When/if I write them, links to following guide posts will appear just below here.
If you have any questions I will answer them whenever possible, but keep in mind if they’re related to note input and the like, they will likely be touched on later.
I was aware of Musescore user crono23 (though I did not know Jonathan’s name) and user Œnanthic…both are incredibly prolific transcribers, and I’m in awe of both their raw output and of the deep knowledge they have of lots of now-obscure parlor music and related genres.
I do hope that as the Great American Songbook starts to move into the public domain, that MuseScore.com can be a place where many of the sheet music versions of these great songs can live. While I’ve done many leadsheets using MuseScore, I’m not a pianist, so transcribing piano music is new to me. I’m giving it a shot, and have produced a couple of scores. Most recently, “‘Deed I Do” from 1926: https://musescore.com/user/28939378/scores/7399322
Keep up the good work!
Yes. We were stuck at 1922 for many years. A lot of those are available online. It’s only been the last three years that the public domain line has begun moving. We now have up to 1925 but not many of those are posted in the collections yet. Baylor U has a good supply through 1958. Personally I think a lot of the songs before the 1920s were great, too. I have a list I call The Greatest American Songbook. It includes early songs like Home Sweet Home, Civil War songs, and gay 90s.
Hi,
Thanks for writing this in-depth review.
Actually, I am also searching for information on how to delete measures in musescore.
I have found the information on how to delete measures in musescore in your article. And I delete my account properly.
I really benefited a lot from your article. Thank you very much.
delete measures in musescore
Is there a MuseScore group working on these songs? I am a performer, and also an advanced MuseScore user and I have some transcriptions that would probably be of interest. And I’d be interested to receive transcriptions that others have done.
My buddy Jonathan Parks is at https://musescore.com/crono23
He is actively inputting notes for piano solos and songs. He wrote the article you see posted here about Musescore. I will sing vocals to any songs you request. I especially like midis to sing to and share. I’ve been using Audio Evolution Mobile Studio on my smart phone to record. Thank you.
I’ve notated >180 public domain pieces (songs [vocal and piano], piano duets, and piano solos) on musescore. My username is dc_99 (or DC_99). Feel free to play / download (and rate or mark as a favorite). All are <1928.